Thanks to my random dungeon bit for Legend on Wednesday, it looks like I managed to get two dungeons in one week with a “dark” issue. Yay for darkness! It’s what we attack with magic missile. Or Blast. Or TTYF.
Watchers of the Sullen Vigil II:
The Temple of the Whispering Dark
This week continues my ongoing campaign-building/scenario designing exercise, dual-statted for BRP and T&T (and as an exercise I’m including some Legend notes as well). Last week we got an overview of the region around the edge of the vast Camrinal Desert, a wasteland filled with deadly dangers. Here at the edge of the kingdom of Aeronost can be found a mysterious order of vigilant knights, the township of Aeronost, a community of benign ghuls and naga, and an old dwarven miner who strikes it rich along the edge of the desert but pays for it with his soul and sanity.
Camrinal was once a thriving empire, but two centuries ago a terrible magical war wiped it out overnight, leaving the land a desolate waste. All of the old empires struggled to survive the magical apocalypse that Camrinal enshrouded the world with, and only within the last few decades has a sense of order been restored.
One such region where order is returning is in Aeronost, one of the new Young Kingdoms that has arisen from the chaos and ashes of the old times. Aeronost has supported a knightly order called the Vigil of the Sullen Watch. The order consists of knights who have come to this desperate edge of civilization to guard the young caravan routes that are growing and prospering from the creeping beasts of the western lands of Camrinal. The hideous monsters, undead and worse that have plagued the remnants of that land are a constant threat, and only the dour and determined knights of the Sullen Vigil can stand against it. Well, them and the adventurers they like to hire for the really down and dirty jobs…
One such job, discussed in brief last week, is the appearance in the dune wastes of a temple, revealed by the shifting sands for the first time. Old maps of Camrinal kept in the Tower of the Watch indicate that no temple of any size was ever there when it was a living land, so there is a mystery afoot. The Order tried to investigate, but they lost their entire first excursion and the second came back terrified. Only hearty, stout-hearted adventurers desperate for coin can save the day…
Background on the Temple of the Whispering Dark
In the present era the people of Aeronost are dedicated to the monotheistic worship of a single deity, called Nevereth, the All-Mother. Scholars can tell you that she was once part of a much larger pantheon, the so-called old Pagan Gods of the lost empires, a practice of faith that fell out of favor with the destruction of Camrinal among all save the demihuman races. Today, Nevereth is the sole goddess of the land, a matriarchal figure who presides over a troop of angelic seraphim to do her bidding, and a host of saints and prophets who carry forth her will by word and deed.
In the old era of Camrinal, such as not the case. The pagan gods were a mysterious and dark force, redolent with ancient power and dark secrets, worshipped not because they were kind to their followers but because they were so fearsome. The ancient mages of the old empire gained incalculable power from these gods, so many of which are now lost to memory, and in taking that power they destroyed their old world.
Not much is known of this lost era or its gods, but just outside the main gates of Aelghast in the vicinity of the shanty town of the ghuls there is an old ghul hag known as Wachara who claims to have been a young girl when Camrinal fell. More importantly, she claims to know some old stories, and it is possible adventurers inquiring for details about the mysterious temple may learn of her and seek out some history on the matter.
(GMs: this is a chance for you to control the volume of information your characters might want; inquisitve groups should get a lead to follow; those who could care less for backstory need not pursue the matter).
Wachara can tell them that the temple was a real place, but it disappeared shortly before the final days of the last war. The mystery of the temple lies with the worship of a particularly vile old pagan god, a tragic love affair and a dark sacrifice to a rival deity. Wachara is happy to tell the story to any who will talk with her, have lunch and drink tea with the old, miserable but wise ghul woman.
This pagan god of old was called Shamanza’gadhal, which in old Camrinish means “Lord of the Whispering Dark.” His followers were mysterious and hated, but his high priest-mages were potent and regarded as privy to ancient secrets of the future. One old story suggests that they heard within the whispers of their god’s maddened dreams that Camrinal would be bathed in magical fire, wiped from the earth. Upon hearing this they took action.
The mage-priest who ruled the ancient temple of Shamanza’gadhal was a man named Tarsos. He was powerful, but not enough to protect his temple. He had an affair with the emperor’s youngest daughter, Etania Caradosh, who was herself a potent earth mage in servitude to an ancient elemental lord now lost to memory. Etania fell deeply in love with the charming but manipulative Tarsos, who talked her into aiding him in his scheme.
Tarsos’ plan was to submerge the temple beneath the earth, to arise when the empire was reborn. Etania petitioned her elemental lord of the earth to aid in this matter, and it agreed to do so, for a price. She must marry Tarsos, and bear a child, which she must sacrifice to consecrate the ritual necessary to submerge the temple.
As all stories of love, tragedy and black magic are prone to go, this one did not end well. Etania bore a child after marrying Tarsos, which itself was a monumental effort as they had to convince her father, the emperor, to allow such a union in the middle of a great war. But when she gave birth, Etania could not bear to slay her child in sacrifice. Tarsos, ever the cruel sort, did the deed, and then slew her as well.
The story is vague about what happened after this point. Some say the temple was submerged protectively beneath the earth, and all traces of it were wiped out as a part of the ritual. Others claim the elemental lord appeared and told Tarsos that he would stand forever as guardian of his accursed temple as punishment for slaying Etania. Still other tellings suggest that the temple sank, but Etania rose as a vengeful ghost to haunt the priests who ensconced themselves within the temple to await a future era when they would be revived after the empire was restored.
Wachara doesn’t know why the temple would reappear now, but she wonders if this means that Aeronost is a spiritual successor to the old empire, or if that portion of the story is simply not true. She does not have a good answer.
Travelling to the Temple
Journeying to the temple requires forging into the wastelands of Camrinal about 20 miles. The desert is hot, the sand dunes barely navigable and the risk of heat exhaustion or dehydration ever present. The lands of Camrinal are a punishing desert, and while Aeronost to the east is a harsh, arid clime, this is much worse.
Each day of travel should require an appropriate fatigue/constitution check to insure that the adventurers are handling travel just fine. On foot will take two days to arrive. By horse not much less, as the horses will find the sands and dunes rough going. Camels, which can be rented from the camel merchant Ghunnar Herdson in Aelghast for 5 gold pieces (with a 30 GP deposit per camel, returnable on safe return of the camels) will cut the journey down to one very long day.
Traveling the deserts can be risky. Wolves and feral ghouls roam the region, as do wandering undead and some more dangerous monsters. Roll on the following chart for each day:
Encounter Risk: 20% chance per two hours of travel or rest while in the desert
D20 - Wandering Monster (Roll of Choose)
1-2 - 2D6 roaming skeletons
3-4 – 2D4 roaming zombies
5-6 – A pack of 2D4 wolves
7-8 – 3D6 feral ghouls on the hunt
9-10 – a small caravan of suspicious but potentially friendly ghuls (2D6 in total, with possible nonhuman guards, either orcs or ogres)
11-12 – a young predatory dragon is sighted within 1D6 miles in the sky
13-14 – A manticore lurks in ambush in a sandy hole it has dug for itself
15-16 – A lone demon in the guise of a friendly or innocent looking person (a young girl, child or elderly person) will try to convince the PCs it is a lost person who wandered from a caravan, or who was taken by bandits and released into the wastes to die. There is a 25% chance it is just curious about the adventurers, but if not, then it is either looking for a better host form to possess, or is simply masquerading until it can reveal its true body to feast on flesh.
17-18 – a group of 2D8 bandits who live the rough life, seeking refuge in the wasteland and then raiding caravans. They use their shanty town in the wastes as a place of safety since most locals (except the Watch) won’t pursue them here.
19 – A spectral ghost (1-12) or a host of ghosts and an entire town (13-20) manifest and interact with the PCs as if they are alive and oblivious to the waste around them. Convincing the ghosts of their reality will cause them to become insanely violent!
20 – A lone mad hermit named Arnestos is found by the PCs, either his small shack in the wilds or perhaps while he is out foraging. He is quite mad, but friendly, and a powerful sorcerer. He will offer the PCs a place to rest if they need it, which is safe from wandering monsters that fear the hermit. Arnestos is actually the earthbound spirit of the old pagan god Naradon’Gahar, once a god of scholars and lore, now a divine spirit forced into an old, frail yet immortal form. He is (or was) brother to the Whispering Dark (though he does not mention this), and will warn friendly PCs of the temple’s dangers, offering each of them a talisman that absorb up to 10 points of protection against attacks that deal damage to POW (or WIZ in T&T). “The god of prophecies perished in flame like all of the old gods,” he will intone. “But unlike some, he dwells in the shadows of death, hungry for life, hungry for escape from a prison not of his own making.”
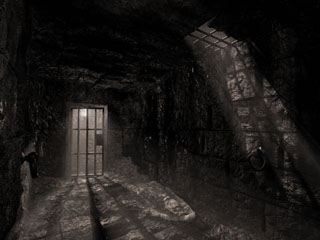
Arrival at the Temple
On arrival, the adventurers will see a wide complex that clearly is much deeper beneath the sands, as if a vast temple complex was forced up from the earth itself. A wide front entry looms dark and open, ringed with eldritch symbols of the lost Mage’s Tongue of Camrinal. Someone who can read it (or try reading a dead language) may learn that the symbols speak of the Whispering Dark by its proper name, and state that all who enter must bow before Shamanza’gadhal and convert willfully, or they will become converts before they leave whether they wish to or not.
The front entrance of the temple also has the dead bodies of half a dozen squires and twice that many horses. Unknown creatures have picked the bodies clean of meat and stolen what goods were stowed in packs.
Exploring the Temple
The following locations are keyed to the map. There may be more levels added at the GM’s discretion if you’d like to expand the complex accordingly. The map is keyed at 20 foot squares. This is a big place. The complex is effectively a network of chambers and tunnels carved out of solid sandstone, which runs deep into the old rock on which it was founded long ago.
The outer rock itself (which was once, long ago, a sort of ancient pagan “Ayer’s Rock” place of worship for the Whispering Dark) was in later generations carved to look like a proper temple complex on the outside, replete with ancient supernatural figures standing thirty feet high, though over the centuries most have worn away. Actually, someone with some background in geology or architecture might notice that the external carvings of the temple haven’t so much worn away as they appear to have “grown over” as if the stone itself were expanding and absorbing the crude works of man. One might almost come away from this heavy stone work thinking that the rock itself was erasing man’s attempts to deface it.
E. The front Entry: The Inner Hall
The Arrow point on the map marks the entrance described above. It opens sideways into a long hall which is decorated with dozens of ancient demonic statues carved from the wall rock. The corridor has two primary exits, and to the right it heads north and downward at a slight slope. There’s a dampness in the air that may surprise the adventurers after traveling through the very dry wasteland in the region.
Further along the north passage that descends on a slow slope is a more or less intact body of one of the previous knights of the Sullen Vigil. He has been killed, and something with claws of steel-strength clearly ripped through his breastplate and gutted him. Clutched in one hand is a sword that glows faintly with a luminous blue light, covered in sticky black blood that feels more like tar. In his other hand is clutched a tuft of coarse black hair, that a naturalist or ranger might safely say looks nothing quite like any normal animal they know of. Also, no footprints of the attacker are evident in the dust on the ground. The man has a necklace around his neck of silver (worth 20 SP) with his name on it: Anton.
Both doors in the main hall are decorated with symbols in the Mage’s Tongue. The door to entrance 2 reads, “Repent,” and the door to entrance 1 reads, “Faithful.” Both doors show evidence from scraping in the thick dust of having been opened. Someone or something closed both doors; prints from the previous knights who visited lead to both doors (but no prints lead out).
The sword in the knight’s hands is enchanted. It is a weapon of pure good, blessed by Saint Arastis the dragon slayer, and it is a broadsword that deals +1 damage to foes, or +1D8 to dragons and demons. The weapon is infused with the good soul of the saint, and any being of evil nature or intent which wields it suffers a 1 POW loss per round. The weapon exudes a permanent soft blue glow for a 10 foot radius that can only be extinguished by a scabbard.
(T&T: A broadsword that deals +1 dice normally and doubles HPT against demons and dragons; evil beings lose 1 WIZ per round while holding the weapon; radiates a soft glow for 10 feet).
Area 1. The Chamber of the Faithful
The chamber of the faithful is the first shrine of the old temple, and the point at which most pilgrims of old would travel to make offerings . The center of the chamber contains a tall statue made of smoky quartz (a close examination reveals it is several large pieces placed together) depicting the image of the Whispering Dark. The figure is of a tall man in ancient armor, with a blank face but eyes in both palms of his hands. He has four legs, though they end in long, single barbed claws instead of feet. The smoky quartz of the statue at first appears normal, but those in its presence for a minute or more may notice that the smoky darkness within seems to shift and move as if it is alive, albeit slowly.
The base of the statue is surrounded by ancient bowls, jars, casks and other objects that once held offerings brought to the statue by countless pilgrims from an era long before the fall of the empire. The walls of this chamber are decorated with extensive stucco images of pilgrims offering gifts, while behind them and overhead a mixture of angelic and demonic figures, often with animal heads, cavort about and sample the many offerings.
Studying the offering vessels reveals that someone has left some coin within a few jars, totaling 133 gold pieces and 267 silver pieces. There is also a locket of old bronze that can be forced open to reveal a small carven image in ivory of what looks like a tiny elephant. Finally, and most disturbingly, there are two bowls directly in front of the statue, which each contain hearts. One is a small heart, and the other is a normal human-sized heart. Both appear black and shriveled, but if touched the hearts begin to beat. They can be burned or destroyed, but will reappear in the bowls unharmed 1D6X10 minutes later after any such attempts to damage them.
Taking any of the treasure in this chamber causes a strange effect 1D3 rounds after doing so: the smoky essence in the quartz of the statue begins to ooze like a mist from its joints, fillng the chamber! As it does so, the strange, barely audible whispering of distant voices can be heard, and the noise begins to gnaw at everyone’s sanity.
Each adventurer needs to make a sanity check (1/1D6 San loss) (T&T: L1 Save vs. INT or WIZ). For each adventurer who fails the check, one of the quasi-demons/angel images separates from the stucco on the wall and attacks. The 3D-version of these images seems eerily real but the adventurers may suspect an hallucination. When the first one strikes and draws blood (visible even to those who made their sanity checks) then they know it is not. The guardians can only be seen by those who failed their sanity check, but they will attack all intruders in the room.
If the guardians are destroyed, then the mist will recede back into the statue, and will not be a threat for one hour. After that time, the stucco images reappear on the wall (even if the PCs manually deface these images they seem to “grow” back in) and the trap is reset. In the hour between it is possible to loot the coin and offerings, but doing so will automatically cause the trap to activate when it resets. The guardians can pursue the looters anywhere in the temple to recover the stolen goods.
Regardless of any other events that happen here, any adventurer that seeks to pass through one of the two doors beyond must make a donation of either a thimble of blood or 10 SP. Upon doing so, the doors will unlock. Otherwise, a normal skill check (fine manipulation/mechanisms or L1 SR vs. DEX or LK) will allow one to pick the locks.
Stucco Guardians of the Shrine
STR 12,
CON 10,
SIZ 15,
DEX 16,
INT 10,
APP nil,
POW 12
EDU nil;
DB +1D4
HP 13
MW 6
Armor: 1 point natural Movement: 10, 16 flying
Notable Skills: Dodge 55%, Fly 60%, Claw Attack 45%, Spot 40%, Listen 35%, Hide 75%
Weapons: Claws (1D6+1D4 and Soul Drain Attack; Potency 18 vs. POW; deals 1D3 damage to both POW and INT on a failed resistance check).
These are animated entities, and as such have no real intelligence, appearance or education scores to speak of. They are still cunning, and so for practical purposes behave as if they have an INT 10.
If an adventurer falls victim to a soul drain attack by either stat dropping to 0, his image will appear 1D6X10 minutes later on the stucco imagery as another pilgrim eagerly awaiting a chance to offer his meager goods to the Whispering Dark…
Legend: +1D2 DB, SR 13, CAs 3; Persistence 45%, Resilience 45%, Perception 40%; NPC HPs 13; Critical Wound 6; Claw attack deals 1D6+1D4 and Soul Attack works the same way.
T&T Stats: MR 45 each; Spite/2 causes a soul draining attack, dealing 1D3 damage directly to WIZ or INT (player’s choice) for each point of spite damage.
Area 2. Chamber of the Repentant
This wide, dark chamber is completely devoid of any imagery, carvings or other features at all save for a series of wide alabaster circles inset into the stone floor, totaling 31 in all. Each circle save for a few has carved upon it a single name, they appear to be names of the old empire, but none stand out as significant. Interestingly, each adventurer (who is not an adventurer) will notice that there are six newer names carved on some of the circles, which appear to be names of Aeronostian origin. They might deduce that these are the names of the six knights who had recently entered the complex (including Anton’s name from the entrance hall). Worse yet, the adventurers may also notice that there are exactly as many empty circles without names as there are members of the adventuring party…
An adventurer who chooses a blank circle and chooses to earnestly pray upon it and dedicate him or herself to the Whispering Dark may make a roll (roll D100 equal to or under POWX3). If he fails, he loses 1D6 sanity and hears the eerie whispering of distant voices. The voices are taunting, maddening, and always on the edge of consciousness, even when trying to sleep. This effect will not dissipate for 1D6 weeks, and each night that he tries to sleep the adventurer must make a new check (POWX3 or less on D100) to fall asleep or lose another 1D2 sanity.
If the adventurer makes the roll, then his soul has earnestly been pledged to the Whispering Dark. He does not lose sanity or have sleep problems, though he does hear the voices and sometimes they seem to be telling him things. Once per month he may roll D100 vs. POW (no modifiers) and if he succeeds, then the whispers impart some specific and prophetic piece of knowledge to him, though at a cost of 1 SAN. This piece of knowledge will always inevitably turn out to have already happened or will be unavoidable (i.e. a vision of a noblewoman falling to her death that the adventurer seeks to stop will lead to him accidentally knocking her from a balcony, arriving in time to witness the accident, or otherwise finding himself only able to insure the tragedy comes to pass).
If an adventurer does not repent and later dies in the temple, his name will appear on one of the circles.
(T&T Terms: Make a L2 Save vs. LK or INT if repenting. Failure causes the adventurer to lose 1D3 WIZ permanently and develop a random madness. Each night he must make a L1 Save vs. INT or LK to fall asleep despite the maddening whispers or suffer 1 WIZ damage. When WIZ drops to zero he goes permanently mad (but then gains all WIZ back immediately). If he gets through the 1D6 weeks this effect persists then all WIZ returns immediately.
If the adventurer succeeds, then once per month he may roll a L2 save vs. WIZ to gain a prophetic bit of information from the whispers as above, but must expend 1D6 WIZ in exchange (recoverable).)
Area 3. Shrine of the Beast
This door is locked, and is reinforced with tarnished brass. A large lion-like head with a wide door knocker hangs in the center. The key can be found in area 6 to open this door, but a diligent adventurer with lock picks can try to open it on a difficult chance of success (roll equal to ½ relevant skill of Fine Manipulation or Mechanisms, or a level 3 Save vs. DEX or LK for T&T).
Beyond the door is a 40’x40’ chamber in which an impressive statue of carved bronze can be found. The statue of tarnished bronze looks like an ancient cross between dragon and lion, wrapped around what appears to be a child-sized coffin made of iron. The coffin is inset in the statue, so a strong individual (difficult (1/2 score) athletics test or roll L2 save vs. STR) could elevate enough to lift it up from the coiling dragon/lion form that holds it in place. Studious scholars will recognize this as a depiction of a mythical sun dragon, said to be a protector of children, infants and mothers in child birth. It’s a creature revered even today as a servant of the goddess Nevereth.
The coffin is bolted from the outside and can be unlocked easily enough. Within is the mummified form of an infant, missing a heart. The infant has around its neck a gold necklace with an image of what looks like an ancient hill with an eye in it. This is a symbol of the lost earth elemental worshipped by Etania. If someone wears this necklace in the presence of Etania’s ghost she will not attack them (area 11).
The child’s body is really a mummy and does not get up. However, it has some weird properties. Its small hands appear to be covered in recent blood. The body itself feels warm to the touch. Merely handling the body or opening the coffin is also enough to alert the Beast in area 4 that it’s corporeal remains are being mishandled…
Aside from the body and the necklace, a small lockbox at the foot of the coffin contains 100 gold pieces and a small golden brooch, in the image of the lost pagan sun god Yath, which if worn will provide a permanent magical protection bonus of 2 AP to the bearer in all locations (against both physical and magical attacks). The device loses this property if damaged. (T&T: it provides 2 hits of magical protection).
Area 4. The Nest and Pit of the Beast
When the infant son of Etania and Tarsos was sacrificed by its father, the soul of the boy transmigrated into a vile form corrupted by the Whispering Dark. The elemental lord of earth then entombed with temple within the earth, and submerged it such that all within were trapped for centuries to come. As it did so, the beast that the child’s soul transformed into went mad, and charged through the temple, slaying all of the priests before they could anoint themselves properly for death to preserve their forms for the future emergence of the temple. The beast then dragged their bodies here, to this chamber which once served as the dwelling of his mother and father, and began a strange sort of nest.
As adventurers approach this chamber they can smell the musty old smell of death long preserved mixed with animal musk. The walls of the passage leading to this chamber are scraped by hideous claws, but no evidence of prints can be found. When the chamber at last opens up, it is clear something terrible has gone on here. Everyone first entering this room must make a Sanity check (0/1D3 loss; T&T: L1 Save vs. INT or experience a terrible sense of dread causing -5 to personal adds for 1D6 rounds).
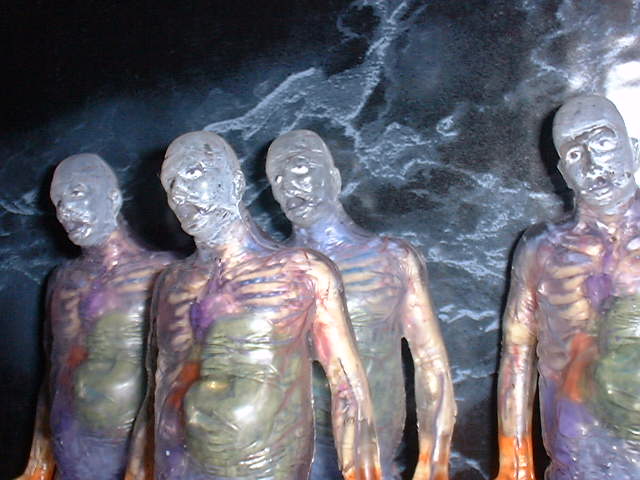
The chamber is filled with black, sinuous pillars of dark, oily flesh that stretch to the ceiling. Embedded in these pillars are dozens of half-living, half-dead men and women, the occupants of the temple when the complex was submerged and the beast ran wild. Some are still alive after two centuries, even though portions of their body are hideously aged or rotted away. Others are clearly undead, but move with the agony of one who can feel their flesh rotting even if their very skin and muscle have peeled away to the bone. The whispering is intense here, mixed with the groans and endless pleas of the trapped and tortured souls of the pillars.
The far end of the chamber (which is 160’x120’ in size) contains a nest of debris and materials stitched together and held by the black, mucous flesh of this room like some sort of glue. If the beast hasn’t moved to investigate intruders elsewhere, it will reside here, prowling among the dozens of pillars of suffering or perhaps sleeping in its abode.
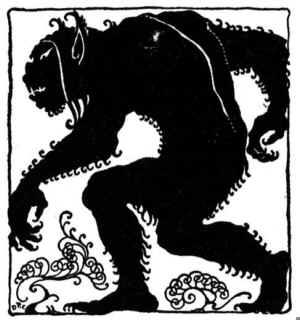
The beast is about eighteen feet tall, covered in a wire-like bristled hair, and has vaguely leonine features, with wide, white blood-shot mad eyes. It’s long forearms end in loping claws that appear to be of burnished steel, and its legs are non-existent, tapering to a serpentine tail that disappears in a trail of smoky mist, explaining the lack of footprints. The beast will attack any intruders it comes across, then add them to its pillars at a leisurely pace.
The beast still contains within it the soul of the Etania’s child. It can do no harm to anyone wearing the necklace around its mummified neck from area 4. Likewise, if the PCs befriend Etania’s spirit, she can quell its rage and insure it does not harm them.
The Beast
STR 32,
CON 20,
SIZ 28,
DEX 12,
INT 6,
APP 4,
POW 16
EDU 0;
DB +3D6
HP 24
MW 12
Armor: 4 points natural
Movement: 14
Notable Skills: Dodge 35%, Claw Attack 65%, Spot 60%, Listen 75%, Hide 60%, Phase Attack 45%
Weapons: Claws (1D8+3D6; bleed); Baleful Howl (1 in 1D4 chance per round it howls; Potency 15 vs. POW: failure means target loses 1D6 SAN, 1 PP and flee at full speed for one round)
Phasing: the beast can move at half speed through solid stone. It can try to do so against living beings, and if it does so it steals 1D6 POW, adding it to its own score. It can only phase for one round at a time, moving as it does so, but when this happens only magical attacks can harm it.
Restoration: Each foe it slays and places in a pillar will restore HP equal to the POW of that fallen foe. Each POW stolen through phasing can be spent to heal 1 HP automatically.
Legend: +1D12 DB, SR 9, CAs 2; Persistence 55%, Resilience 95%, Perception 65%; NPC HPs 24; Critical Wound 12; 4 Pts Natural Armor; Claw attack deals 1D8+1D12 with bleed; Baleful Howl: Potency 75 vs. Persistence; failure means loss of 1D3 POW/MP and flee for one round, unless Sanity rules are being used then as above; HP by Location: 10 for tail, 11 abdomen, 12 chest, 9 per arm, 10 head; same chart as Lamia.
T&T Stats: MR 220; Spite/3 Every time 3 or more spite are dealt the beast lets loose its Baleful Howl. Each adventurer must make a L1 save vs. INT or WIZ or suffer from a random effect: 1: lose 1D3 WIZ, 2-4: flee at full speed for one round; 5-6: lose 1D3 WIZ and INT)
Area 5. The Outer Sanctum and Private Temple
This wide open chamber was once where the priests conducted their own daily prayers and business. A somewhat more modest statue of the same deity as depicted in area 1 can be found centered in a ry water fountain in the center of the chamber, made of the same murky, smoking quartz that seems to move (depending on how they handled area 1 this might make them jumpy). A throne rests in front of the door leading to area 6, where the high priest Tarsos once conducted his daily business.
The throne is now vacant, save for what appears to be a whispery, ghost-like image that rests its chin upon the palm of its hand. The image is little more than a vague, chilling impression of a person to the normal eye, but if the light of the sword from area 1 bathes it in blue light then the image alights as Tarsos in the flesh, and becomes aware of the adventurers around him.
If so revealed (at the GM’s discretion other magical light cast by a caster of good deed or nature may have the same revealing effect) then Tarsos will react with surprise and some fear. “Who are you?” He intones in whispers. “You should not be here. The temple cannot rise until the empire is restored. Now go!” he will get angry.
PCs can try to negotiate with him, talking him down from what appears to be a wild madness as he looks about fearfully, as if afraid the noise he makes will attract unwanted attention. He is right about this; for every round that the adventurers talk to him, if they have not encountered the beast in area 4 yet, it may make a listen/perception check to “hear” Tarsos. It will then charge at full speed to this location, and seek to first rend the spirit of Tarsos to bits (no hard task; he only has spirit stats of INT 17, APP 16 and POW 21 but all damage the beast does is by phasing) before turning on the PCs.
If the PCs can negotiate with Tarsos’s ghost before it is attacked, he will plead with them to leave, and failing that beg them to find his amulet, and present it to Etania as a gift, to beg her forgiveness. He says that he lost track of the amulet long ago, and knows not where it is now, but it was once in his bed chambers where the beast now makes its nest.
PCs who have been to that chamber will know that they found no such amulet. It now rests in the Hall of Lost Memories, where the shade of the child holds it (area 10).
Area 6. The Hidden Chamber of the Priests
This chamber was once housing for the priesthood, a communal bunker for the cloistered order that had given up worldly possessions and delights to pursue the prophetic whispers of their god. The chamber is not derelict, with crumbling furniture, beds, desks and debris everywhere. Moldering remnants of old tomes and books can be found, but nothing appears salvageable. A careful search will reveal a fully intact staff with a solid smoky quartz crystal, a lost relic of worship to the Whispering Dark. The staff has long since lost its power, but could be restored with some effort by those with a talent for enchantment. It once served as a power battery. The staff also has one useful trait which a knowledge or lore (occult) check or a L1 save vs. INT might reveal: the smoky quartz crystal on the end is a pure version of something called a Spirit Stone, and it can be used to channel an otherwise bound spirit or ghost, serving as a focus and bind point for such entities.
Area 7. The Hall of Whispers
Entering this wide and unadorned chamber hall is immediately disconcerting, for it is completely dark by magical means and even magical light such as from the sword in the entrance area is extinguished. The whispering grows intense, and any who seek to pass through here must do so with all senses impaired (sounds is dampened and the chamber makes all within blind).
After 1d3 rounds of entry, each adventurer will feel a sharp and eerie pain, as if something has reached into their very being and pulled something important from them. That same moment, an ebony skeleton armed with the same weapon and armor (if any) as the adventurer it was pulled from appears and attacks. This effect will happen to each person who enters the chamber (and lingers too long) once per hour. If an adventurer fails to slay his skeletal doppelganger after 1 day, he permanently loses 1 POW (T&T: 1 WIZ).
Shadow Skeletons (BRP page 346)
STR 11,
CON nil,
SIZ 13,
DEX 10,
INT 10,
APP nil,
POW 1,
EDU nil;
DB 0
HP 13
MW 6
Armor: none unless the PC it comes from wears armor
Movement: 10
Notable Skills: Dodge 40%, Doppelganger’s Weapon 40%
Weapons: armed with a shadowy version of the PC’s own weapon
These shadow skeletons are normal skeletons, but the armor and weapon they wield is made of shadow stuff and dissipates if they are destroyed, as does their body.
Legend: use the skeletons as presented in Monsters of Legend
T&T Stats: MR 38 each; Spite/1 normal
Area 8. The Unused Hibernation Chambers
This long chamber contains dozens of what appear to be glass coffins along the wall and in the center of the chamber, with a staircase leading to an open second floor above in the 30 foot tall chamber, and dozens more on the second level. Many of these glass coffins have been shattered, and a few skeletal remains can be found draped within. Still more are intact, and appear to be filled with a strange, clear fluid.
There is only a single glass coffin that contains a preserved body floating in the amniotic fluid. The mechanism attached to each coffin to open it is old and stuck, but with some force it can be activated to open the coffin. The man within is an old priest of the Whispering Dark named Baelcar, and he is miraculously still alive, though he knows not why. When he awakens within 1D6 rounds of the coffin being opened and the fluid gushing out he will be disoriented and suffer from amnesia. Within 1D3 days he will begin to recover his memories, realizing that he may have been spared (unlike his fellow priests) by the beast because of the kindness and pity he showed its mother, Etania. Indeed, he explains that he helped her give birth. He was powerless to stop the ritual of sacrifice; however, for after some harsh words about the matter with Tarsos the high priest had Baelcar dragged her and interred immediately to keep him away from the ceremony.
Baelcar is too weak to even walk by himself, and it will take weeks for him to rebuild lost muscle tone, but he could eventually become a useful henchmen or ally to the adventurers, and he is a practiced priest and sorcerer. Stats for him can be devised at a future date by the GM if needed.
Unfortunately, Baelcar does not know how to lift the curse on the temple or free its denizens of their tortured misery. He seems to have faith in the Whispering Dark, however, and proposes that the adventurers petition the god for direction in its inner temple at area 12. He says that the god may be “dead” now, but if its spirit, its essence, were to be freed once more and worshipped by men, then perhaps the god could be reborn into the world anew, to live once more to instruct man of the threats and needs of the future.
Area 9. The Second Hibernation Chamber
Once a meditation room, it was later renovated into a second hibernation chamber much like area 8. Upon entering this chamber the adventurers will notice that something is amiss; it appears that most of the dozens of glass coffins filled with fluid still have bodies inside, but the entire chamber is also permeated with the dark mist-like substance that they have potentially encountered elsewhere. The Whispering Dark’s bound spirit, trapped in madness, has corrupted the bodies of its hibernating priests such that the beast saw no need to seek vengeance upon the occupants of this chamber.
However, there is a bigger problem. Any who enter will notice that the bodies begin to move and thrash about if they approach within 10 feet of a given coffin, eyes flying wide and clear madness radiating from the blackened, saturated flesh of the priest within. Indeed, the priests have become zombies, desperate to escape! For each zombie so awakened, they have a 25% chance per round of thrashing about that they will either shatter the glass or hit the emergency release from within the coffin. They will then proceed toward the nearest living being to sate their insatiable hunger for flesh…
Corrupted Priest-Zombies (BRP page 350)
STR 16,
CON 16,
SIZ 13,
DEX 7,
INT 6,
APP 3,
POW 1,
EDU nil;
DB +1D4
HP 14
MW 7
Armor: none unless the PC it comes from wears armor
Movement: 10
Notable Skills: Bite 30%, Claws 25%, Grapple 35%, Crude Weapon/Club 35%
Weapons: Bite (1D3, bleed), Claws (1D3, bleed), Grapple (special), Club (1D8+1, crushing)
Slashing, crushing and impaling weapons deal half damage to zombies. These zombies require a special success dealing damage to the head to put them down (see page 361).
Legend: use the zombies as presented in Monsters of Legend
T&T Stats: MR 42 each; Spite/2 Bleed effect: each target that takes spite damage continues to bleed for 1 Con/round until they can stop and make a L1 save vs. LK or INT to staunch the flow
 Area 10. The Hall of Lost Memories
The hall of lost memories was once another chamber for another purpose, but when the empire of Camrinal fell and the temple was buried by magic beneath the earth, it was repurposed into a reservoir for the unfulfilled prophecies and visions of Shamanza’gadhal. The chamber is decorated with religious ornamentation of obscure and symbolic nature along the walls and floors, and a heavy stone door with an image of the god can be found in the north wall. In the center of the room rests a shadow form of what appears to be a young child holding a golden amulet, over which hulks an immense shadow, that of the beast from area 4. The child speaks eloquently as an adult even though the shadow form can’t be depicting a child of more than a couple years of age (and the infant from the coffin in area 3 was clearly a newborn). So it seems that the true spirit of the child has aged.
The child seems perplexed. Those who approach it wearing the necklace that came from its body in area 3 will earn its ire. “You have my necklace, I want it back,” and if they don’t hand it over (the shade has substance and will clutch the necklace.) When he takes the necklace, he will drop the amulet and lose interest in it (a chance for the adventurers to grab it).
If the adventurers don’t have the necklace the child will ignore them. If they try to take the amulet by force then they can do so, but the child shrieks and summons monsters (see the summoning roll below for what). Any attempt to take the amulet that isn’t a trade will lead to a fight.
Those who speak to the child soothingly (Persuade or Charisma check) can get his attention without spooking or angering him. Some coaxing reveals he needs to answer a question before he can pass through the stone door, and he needs to get through the stone door. “My father is in there,” he will state. “But he needs to know my true name. I don’t know my name.”
His only clue, if he has the necklace, is that it was fashioned by his mother. “She knows my name. She gave it to me.”
Adventurers who approach the stone door will hear the persistent whispering in the chamber reach a crescendo and then a single voice asks two pertinent linked questions, heard by all:
“You stand within the Chamber of Lost Memories. Our lord has but fragments of knowledge, and to enter you must share your own. Tell me, mortal, has the Empire Risen, such that He May Rest?”
Depending on how they answer the question, the door may or may not open. Here are some guidelines:
Yes it has risen, and he may rest: The voice answers, “You lie. The visions have shown no restoration of this lost glory.”
Yes it has risen, but he may not rest: “You lie, but you speak the truth, for his wanderings must be endless.”
No it has not risen, and he may rest: “You speak the truth, but his prison is eternal.”
No it has not risen, and he may not rest: “You are honest, and you may enter.” At which the door will open for all.
Any other answer will result in a increase in the whispering noise, followed by a pained cry. Roll for what happens next:
Monsters Summoned; Roll 1D6: 1-3 1D2 skeletons per adventurer in the room manifest in area 7 and proceed to this chamber to attack; 4-5 the Beast from room 4, if it has not already been dealt with, moves toward this chamber to attack; 6: both of the above.
If, after defeating the foes anyone lives, then the door quietly slides open. It will not allow the child to enter, who in turn refuses to do so until he knows his true name.
Meanwhile, the child has the power to rid the temple of the beast if the adventurers can talk it into understanding what harm its unleashed id has caused. If they can convince the shade to put on its burial necklace, then the beast is destroyed immediately. This can happen automatically if they befriend Etania’s ghost, whom the boy will listen to in room 11.
The child’s shade is weak. If anyone were to use a means of destroying it (INT 9, APP 12, POW 16; T&T: MR 18) then they would be able to do so, but many events possible in area 11 and 12 end in what could be called “the bad ending.” 1D6 minutes after the child’s spirit is destroyed, the entire complex begins to submerge beneath the earth again, and the adventurers have 1D10 combat rounds to escape! (This time is shorter than at the end for other options; the idea being the process happens faster when the one innocent soul in the complex gets snuffed.)
Area 11. The Shrine of the Mother
This simple chamber is similar to room 3, but there is not statue within, only a plain, unadorned coffin wrapped in chains on the ground. A faint whimpering and crying can be heard over the persistent whispering of this infernal temple.
There is no way to manifest Etania’s spirit without the amulet of Tarsos, which is held by the shade of the infant in area 10. Placing the amulet on top of her coffin in an inset of the master lock that fits it precisely will cause the chains to rupture, and within one round her ghost flows fluidly like ectoplasmic smoke from the coffin itself. Her appearance requires a sanity check (0/1D4 loss; T&T: L1 Save vs. INT or lose 1 WIZ).
If the adventurers are foolish and brave and attack her, refer to BRP page 342 for details on ghosts, with her specific stats being INT 21, POW 24, APP 18. However, Etania has no desire to fight, and will only do so because she is disoriented and wreathed in blind madness and pain from what she has suffered through. Seeing the amulet is enough for her to speak rationally.
(T&T: Etania’s spirit is MR 146 and all damage dealt reduces WIZ and INT, player choice).
“I…have been freed…..but why?” and if adventurers respond with some of what they have learned, they get different responses:
Telling her of Tarsos’s Desire for Forgiveness: She will become enraged and shout that the curse is not his but hers: “I could not kill my child! Satarnas demanded it, my beloved chthonic lord of the depths, but I could not give my child over. Tarsos was stronger, but he banished his own god to hellish imprisonment in doing so. Satarnas played us both for fools, he only wanted to imprison his rival, the one who whispers in the dark, Shamanza’gadhal. We were but pawns in this madness….”
Telling her of her son’s Shade in the Chamber of Lost Memories: “My child! His soul is intact, but trapped within this hell. If you could but take me to him….alas, I am bound to this coffin which contains my mortal husk…”
On the Name of the Child: “Only I can tell him. If there is but a way to bring me to him…”
Other inquiries may reveal the following:
Etania’s earth god was a being whose name was previously lost to history called Satarnas. Satarnas is an ancient elemental spirit, the literal embodiment of the stone hill in which this temple was crafted. Apparently, long before it was consecrated as a temple to Shamanza’gadhal it was a place of ancient druidic worship for Satarnas. Satarnas, it turns out, was weak, and needed the sacrifice of blood started (and continued) by Etania’s child. When the child was slain, its spirit was immediately split into its passive and aggressive sides, creating the shade and the beast. The beast spilled much blood, fueling the ritual and allowing Satarnas to engulf and entrap the entire complex beneath the earth. The ritual was only set to last for two centuries; it has at last worn off, and the temple has resurfaced. Satarnas has since passed on into deep slumber beneath the mantle of the land, but his victory was complete, for Shamanza’gadhal was trapped, and when the magical destruction hit Camrinal and destroyed not only the empire but its gods as well, he was slain immediately in his prison and now his spirit alone lurks, haunted and doomed, and unable to do much more than whisper prophecies of dire yet inevitable portent.
Etania thinks that freeing Shamanza’gadhal will lift the curse and allow her spirit and the others to rest, at last. Taking her to her son is the first step, she says.
If the adventurers either use the staff from area 6 or manually drag the coffin down the hall to area 10, they can get her to speak with her son. There, she will tell her son his true name:
“My child, who I did not name before you died. I shall call you Sempitermus.”
And with that, the child will nod approvingly, give the necklace to his mother and then approach the door, which opens for him. He will enter area 12. If the beast still lives, the revelation of the child’s true name will summon the beast, which dissipates and blends seamlessly with the child, making him whole once more.
Area 12. The Inner Temple and Throne of the Whispering Dark
This chamber is the center of the cacophonic whispering, which is now so loud and prevalent that it is as if ten thousand voices are all whispering the dire secrets of the universe at once. Smoky mist fills the chamber, obscuring site, and a vast, squat figure rests in the center of the chamber, fully twenty feet across, slouched forward as if in some sort of slumber. The figure is an immense, toad-like being, with black, dry skin, faceless, and four immense legs ending in thick, powerful barbs. It is the real Shamanza’gadhal, lord of the Whispering Dark, not merely the stone image of him that rests here.
The chamber contains dozens of shadowy figures moving about, some appearing, some disappearing. The shades of the many who died and were entrapped in the temple can be found here. They will move angrily toward and away from the adventurers, but will not seek to harm….yet.
The adventurers could take a number of actions within this chamber. Some good, some not so much, and some having dire consequences.
Entering with the child Sempitermus: The child will step before the body of the god, and tell him, “Father, I know my true name. Please accept this and release my mother from purgatory.”
The whispers will coalesce into one voice, and the deity will speak, “Tell me thy name, son.”
As the child speaks it, the body will shudder and then collapse on itself, withering away. As it does so, the temple will begin to shake, and the adventurers will get the sense that the will of the dead god was all that kept the complex standing. They have 1D3 minutes to escape!
Note that as the beast shudders and begins to collapse, a thick orb of pure platinum will roll from its chest, a palantir-like object which is the stuff of dreams and visions. It is the Orb of Shamanza’gadhal, a powerful artifact containing the essence of the god’s power. GMs can run with this for future plot hooks as desired, assuming the adventurers grab it before fleeing!
Entering without the child: Any attempt to mess with the god’s moldering body will anger the shades in the chamber of which random ones will attack (1-2 per adventurer per round). Each shade has INT 10, APP 10 and POW 12, but a phasing attack at 60% that strips away 1 POW from the target it strikes. They are otherwise insubstantial ghosts and can only be affected like ghosts.
(T&T: the shades are MR 22 but all damage done including spite comes off of WIZ).
Nonetheless, hacking at the body for 1D6 minutes can reveal the orb by accident. If the orb is removed from the god’s body, then the temple shudders and begins to sink into the earth in 1D3 minutes (albeit without the freedom of the spirits trapped here).
Entering with more than Half the adventurers dedicated to Shamanza’gadhal: If all the PCs entered chamber 2 and passed the ritual, becoming true dedicates to the god, then when they enter this chamber Shamanza’gadhal’s spirit will coalesce out of the voices and beseech them to take the Orb of Shamanza’gadhal within its chest, to carry it out of this hellish prison, and to revive its cult that he may live again. The body will then shudder and expel the orb willingly. If the adventurers (now being true dedicates) follow through then they have an entirely new adventure lying in wait as they become the founders of a new cult dedicated to an ancient god of prophecy. New worshippers might, in fact, cause the deity to be reborn anew, though the act of worshipping one of the old pagan gods will put them at dire odds with the monotheistic church of Nevereth, as such old beliefs are now publically outlawed.
There may be other possible endings, but you may have to adjudicate accordingly!
NEXT WEEK: Hexblades in Legend and T&T!
(Note: apologies for any typos! I didn't properly proof this before getting it on the blog; long week, not nearly as much time as I would have liked to polish this as it needed)
(Note #2: Cleaned up some of the typos and made a few corrections, so at least some of the more obnoxious (to me) glitches are gone now)